The order matters more than the product: brush and erase dry, and only reach for liquid when that has failed. These four cover both halves, ranked on published method.
By Scooter M., Enthusiast. Published September 21, 2026.
We earn a commission if you buy through the links on this page, at no extra cost to you. It never changes a ranking, and we recommend products with no affiliate link behind them where those are the right answer. Full disclosure.
Quick picks
The shortlist, ranked
Ranked on published manufacturer specifications and, where a wattage figure exists, computed running cost. Tap any row for the full write-up, including who should skip it.
#
Product
Best for
Score
Price
01
KIWI Suede and Nubuck Shoe Cleaner KitA first suede kit, where you own nothing for napped leather yet
Scores are ours and editorial. They are never published as review or rating markup, because we have not tested these products.
Suede and nubuck are leather with the surface deliberately raised into a nap, and everything that makes them look good also makes them fragile: they hold dirt, they mark with water, and the oils and creams that rescue smooth leather will flatten them permanently. The right kit is cheap. Using it in the right order is the part that saves boots.
We have not tested these. What follows is ranked on what each maker publishes about method and materials, with the honest limits of each - including one pick whose maker no longer serves a product page we can read.
How we judged them
Dry tools before wet ones. A crepe eraser and a brush remove a surprising amount of what is on a suede boot, and they cannot leave a tide mark. Any kit that does not include them is incomplete.
Published directions. Suede is the material where a patch-test instruction and a stated method matter most, because the mistakes are irreversible.
Does it restore the nap? Cleaning flattens. A kit that gives you a way to lift the nap again is doing the whole job.
Does it pair with a protector? Clean suede that goes straight back outside untreated is a boot you will be cleaning again next week.
Is it honest about what it cannot do? Nothing here removes a deep oil stain or a salt mark that has bleached the color out.
The order that saves suede boots
Dry first, always. Let mud dry completely, knock it off, then work with a crepe eraser and a brush. Only if the mark survives that do you go anywhere near liquid - and then you treat the whole panel rather than the spot, because a wet patch on suede dries as a ring. How to clean suede boots is the full method with the timings.
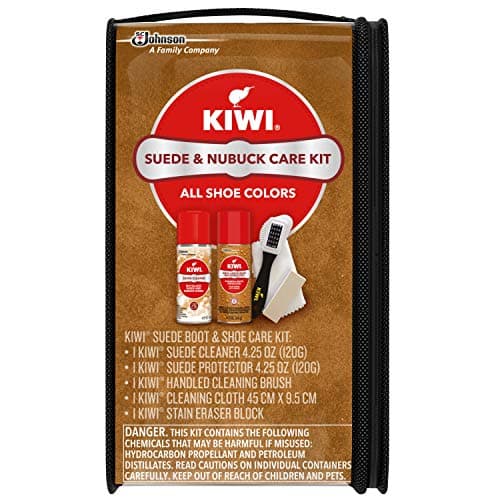
The one box that covers both halves of the job. By the manufacturer listing, the kit contains a suede cleaner and a suede protector at 4.25 oz each, a handled cleaning brush, a cleaning cloth and a stain eraser block - the dry tools and the wet ones, plus the protector step most people skip.
That combination is what earns it the top spot. Buying a cleaner alone leaves you with clean, unprotected suede; buying an eraser alone leaves you stuck when the mark is a liquid stain. This is also the cheapest route to owning all four items at once, which matters for a material where the tools cost more than the cleaning agent.
The honest downside: KIWI’s own product pages for this kit no longer resolve - they redirect to a brand contact form - so the contents come from the manufacturer’s retail listing rather than a spec page we can link you to. That is a genuine documentation gap and it is why this page does not quote directions for the cleaner itself. Aerosol suede cleaners also need a patch test more than most, because the propellant distributes the solvent unevenly if you spray too close.
2. Fiamme Suede and Nubuck Cleaning Kit - best dry tools
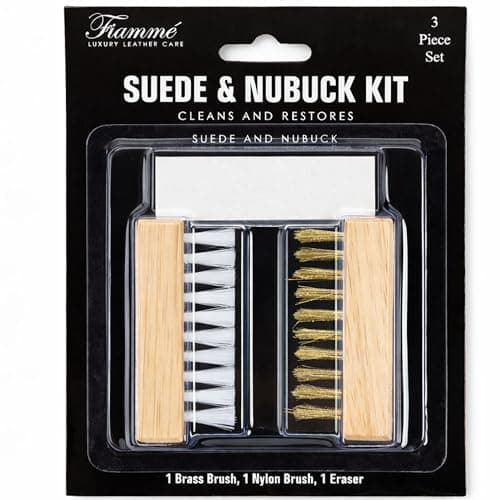
A crepe-rubber eraser block and a mixed brass-and-nylon brush: the two tools that do most of the real work on a suede boot. The eraser lifts surface marks by abrasion rather than chemistry, and the brush both cleans and restores the nap afterward.
If you own nothing for suede, own these first. They handle dried mud, scuffs and the flattened, shiny patches that develop where a boot creases - none of which need liquid, and all of which get worse if you reach for it. This is also the right first move on a salt-marked winter boot; removing salt stains from suede is the procedure.
The honest downside: brass bristles are aggressive. Used hard, or used on smooth leather by mistake, they scar the surface - and repeated heavy brushing thins the nap over time. There is no published spec sheet for the kit beyond the listing, and a dry eraser will not touch an oil stain or a dye transfer.
3. Jason Markk Essential Kit - best wet clean
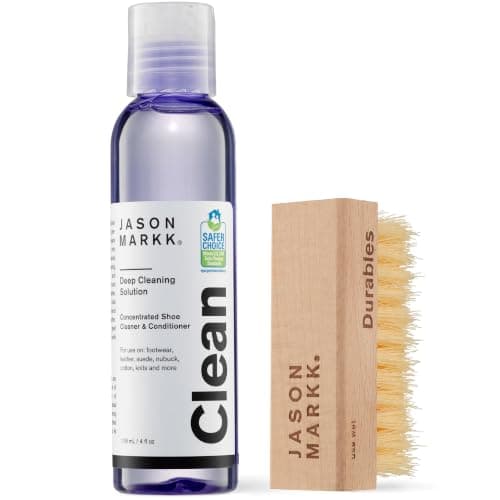
When dry tools have failed, this is the gentlest way to go wet. The kit is a cleaning solution plus a brush, and Jason Markk publishes the contents and a method built around a small amount of solution worked into a lather rather than soaking the material.
The technique it is designed around is the one that works on suede: minimal liquid, worked evenly across a whole panel, lifted off rather than rinsed. On a boot that has taken a coffee splash or a road-spray stripe, that is the difference between a clean boot and a boot with a ring on it.
The honest downside: it is a sneaker-first formula and brand, and a work boot caked in farmyard mud is not what it was designed for. The bottle is small and the cost per clean is higher than a bar of saddle soap - though saddle soap is exactly the wrong product for suede, so that comparison only goes so far. It also does not include an eraser, so it is a complement to the dry tools rather than a replacement.
4. Nikwax Footwear Cleaning Gel - best before reproofing
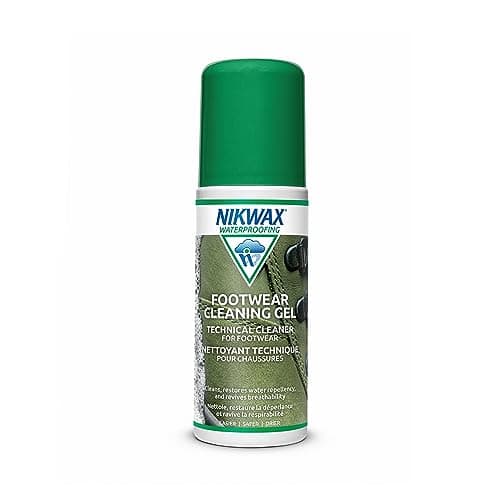
The pick when cleaning is step one of a two-step job. Nikwax publishes a water-based, biodegradable, PFAS-free gel in 125 ml with a brush applicator, and a method that is genuinely different from the others here: rinse the boot to dampen it, scrub with the applicator, rinse well, dry naturally.
It earns its place because of what comes next. A suede or nubuck boot that is about to be reproofed has to be clean first or the proofer sits on the dirt, and Nikwax’s own proofers are designed to go onto a wet boot - so cleaning and proofing run together as one job. Waterproofing suede boots is the second half.
The honest downside: it wets the whole boot, which is fine as part of a clean-and-proof session and overkill for a single scuff. 125 ml is a small bottle, Nikwax says to test hidden areas first for color run, and it only makes economic sense if you are buying the proofer too.
Nap is the whole material. Anything that mats it - oil, wax, heat, hard brushing - is a permanent change.
What none of these will fix
Worth saying plainly, because the category oversells itself:
Oil and grease stains. Oil goes into the nap and stays. A cleaner may lighten it; nothing here removes it reliably.
Salt that has bleached the color. Salt draws moisture and takes dye with it. You can lift the white residue; the pale patch underneath is usually permanent, which is why preventing salt stains beats treating them.
Water marks on untreated suede. The best outcome is usually to wet the whole panel evenly so it dries uniformly rather than as a ring.
A flattened, shiny crease. Brushing helps. A crease that has been polished smooth by wear does not come back.
Clean, then protect - or you will be doing this again
The single highest-value thing you can do to a suede boot is treat it before it is ever dirty. A protector does not make suede waterproof, but it buys the time you need to brush a splash off before it becomes a stain, and it makes every clean after that easier.
The KIWI kit includes a protector; if you bought the dry tools on their own, the suede protector roundup ranks the sprays. For boots that are also getting salted every winter, the combined routine is in how to prevent salt stains.
Which one, in one line each
You own nothing for suede: the KIWI kit - cleaner, protector, brush, cloth and eraser in one box.
You want the two tools that matter: the Fiamme eraser and brush.
A stain that survived dry cleaning up: Jason Markk, worked into a lather across the whole panel.
Cleaning before you reproof: Nikwax Footwear Cleaning Gel.
If your boots are smooth leather rather than napped, none of this applies and the products are different - the boot cleaning kit roundup is the right page.
Five marks, and which tool each one needs
Most suede questions are really one of these five, and the answer changes for each.
Dried mud. Let it dry completely, knock it off, brush along the nap. Liquid on wet mud drives it in and turns a surface mark into a stain.
Salt tide lines. Brush first, then treat the whole panel rather than the line - and expect the white deposit to lift more readily than the bleaching underneath it. The full salt method is here.
Water marks. The counterintuitive fix: wet the whole panel evenly so it dries uniformly, then brush the nap up once dry. Spot-treating is what creates the ring.
Shiny, flattened creases. A brush lifts the nap where it has been pressed down by wear. Where the fibers have been polished smooth over months, brushing improves it and does not restore it.
Oil and grease. The one honest “no” on this page. Nothing here removes it reliably, and aggressive attempts usually make a small dark spot into a large pale one.
How often to do this
No maker on this page publishes a frequency, so here is a habit rather than a spec. Brush suede boots after each wet or muddy wear, while the dirt is still on the surface - that is thirty seconds and it prevents most of the work. Do a full clean when brushing stops being enough, which for a winter boot is usually once or twice a season.
Re-proof after any full clean, because cleaning takes the repellent with it. That sequence - brush often, clean rarely, proof after every clean - is what keeps a suede boot looking like suede for years rather than one winter.
Nubuck and suede are not the same material
They get treated as one category, including on this page, so here is where the routine genuinely differs.
Suede is made from the underside of the hide, or from a split, and the nap is longer and softer. It marks readily, it takes dye unevenly once it has been wet, and it responds well to a crepe eraser because the fibers are long enough to be lifted afterward.
Nubuck is top-grain leather sanded on the outer face, so the nap is much finer and the material underneath is stronger. That makes it more durable and less forgiving at the same time: heavy brushing polishes it smooth rather than lifting it, and once an area has been burnished flat it stays that way.
The practical rule is to brush nubuck more gently and in one direction, and to keep the brass side of any dual brush for suede only. Boots described by their maker as “waterproof nubuck” usually have a membrane behind the leather as well, which is another reason to keep oils and waxes off them - the hiking boot roundup explains why a water-based proofer is the correct product there.
The write-ups
Every pick, in full
01 / Best complete kit
KIWI
8.0 / 10
KIWI Suede and Nubuck Shoe Cleaner Kit
The cheapest way to own every tool suede needs at once - cleaner, protector, brush, cloth and eraser block in a single box.
+Built-in brush applicator, so it is one item not two
+Safe on Gore-Tex and eVent by the maker's own statement
+Biodegradable and PFAS-free
What it does not
−125 ml is small
−Nikwax says to test hidden areas first for color run
−Only makes sense as half of a two-product routine
Skip this one if
Your boots are plain smooth leather with a wax finish - saddle soap is cheaper and does the same job.
How it scores, by criterion
Documented use10.0
Material range9.0
Ease of use9.0
Published composition9.0
Coverage per bottle6.5
How these picks were chosen
Everyone in this category says they tested twenty dryers. We have not tested any, and we say so. What we did instead: read the manuals, compile the published specifications, compute the running cost from the manufacturer's own wattage figure, and show the arithmetic so you can check it.
For most people a kit that includes both dry and wet tools - the KIWI Suede & Nubuck kit covers cleaner, protector, brush, cloth and eraser block. If you only buy one thing, buy a crepe eraser and a suede brush: they handle most marks without any liquid at all.
Can you use water on suede boots?
Cautiously, and never on one spot. Water marks suede as it dries, so if you go wet you treat the whole panel evenly and let it dry naturally, away from heat. Dry tools first is always the safer order.
Is nubuck cleaned the same way as suede?
Broadly yes - both are napped and both are cleaned dry first, brushed to lift the nap, and kept away from oils and waxes. Nubuck has a finer, tighter nap, so brush it more gently than a suede boot.
Can you use saddle soap or leather conditioner on suede?
No. Conditioners, oils and saddle soap mat the nap and darken it, and the change is not reversible. Every conditioner maker on this site excludes suede in writing for exactly this reason.
How do you get salt stains out of suede boots?
Let the boot dry, brush the residue off, then treat the whole panel rather than the mark. The white deposit usually lifts; a patch where salt has drawn the dye out often does not. The full method is here.
Should you protect suede boots after cleaning?
Yes, and it is the step that decides how often you repeat the clean. A protector does not waterproof suede, but it buys you time to brush a splash off before it sets into the nap.