How to polish boots, and what to polish them with
Polishing is cosmetic. Conditioning is care. Most ruined shines come from doing them in the wrong order, or from doing only the first one for years.
By Scooter M., Enthusiast. Published September 13, 2026.
We earn a commission if you buy through the links on this page, at no extra cost to you. It never changes a ranking, and we recommend products with no affiliate link behind them where those are the right answer. Full disclosure.
Polish does not look after your boots. It colors them and it shines them, and both of those are worth doing - but a boot that has been polished weekly for three years and never conditioned is a boot that is about to crack.
So the sequence below starts before the polish comes out of the tin. Clean, condition, then color, then shine. Ariat publishes the same ordering in its own boot-care guidance - condition first, then apply the polish the same way you applied the conditioner, rubbing in small circular motions with a dry cloth until the polish is fully absorbed. Get that order right and everything else here is technique.
Cream or wax? They do different jobs
This is the decision people get wrong at the shelf, and it is not a quality ladder - it is two different products.
- Cream polish carries pigment and some nourishment. It goes into the leather, puts color back into scuffed and faded areas, and leaves a soft sheen. This is the one that repairs how a boot looks.
- Wax polish is a hard film that sits on the surface. It builds gloss, adds a little weather resistance, and does essentially nothing for the leather underneath. This is the one that produces a shine.
If your boots look tired and patchy, you want cream. If they look fine but dull, you want wax. If they look tired and you want them gleaming, you want cream first and wax over the top - which is how the shoeshine stands have always done it. The longer argument, including where a true dubbin sits, is in polish vs cream vs wax.
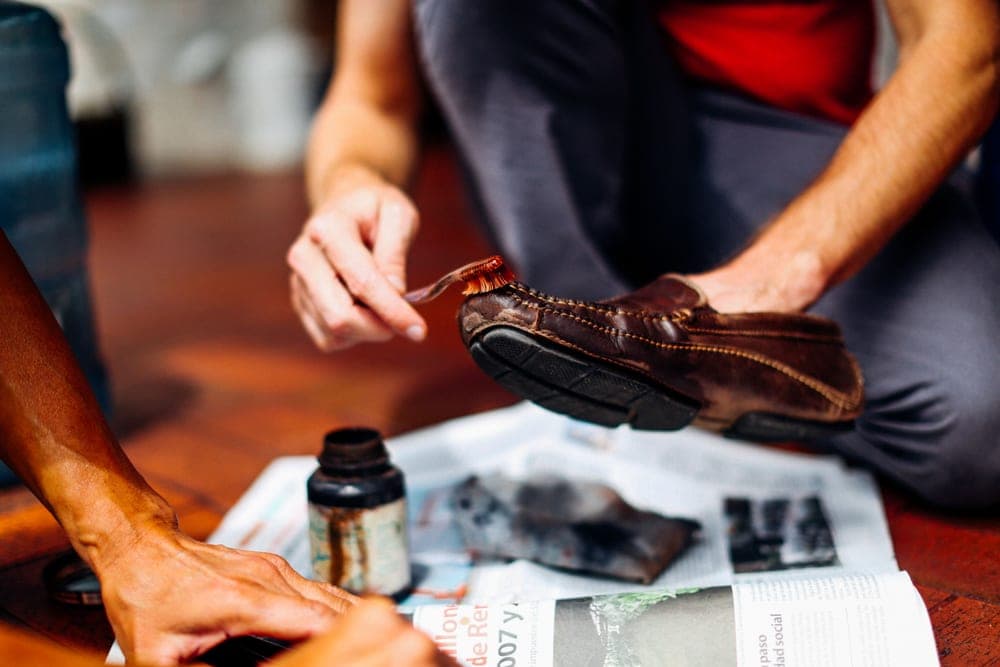
The method
- 01
Clean the boots, and let them dry
Dry mud brushes off; wet mud smears into the grain and then gets sealed under the polish. Ariat’s own instruction is a damp cloth for dirt and a soft brush for scuffs, then “make sure your boots are completely dry” - and never with direct heat, which causes cracking. The full routine is in how to clean leather boots.
- 02
Condition first, and let it absorb
Polish seals the surface. Anything you wanted to feed the leather has to go in before that happens, or it will be sitting on top of a wax film doing nothing. Thin coat, a few hours, buff off the surplus. How often is in how often to condition boots.
- 03
Cream polish, worked in with a cloth
Small amount on a cloth wrapped round two fingers, in small circles, over the whole boot. Work extra into scuffed areas and along the welt. Neutral cream is the safe choice if you are unsure of the color; a matched color does more for a scuffed boot but has to actually match.
- 04
Let it haze, then brush it out
Give it ten or fifteen minutes until the surface goes matte, then work the whole boot briskly with a horsehair brush. The brushing is not optional and it is where most of the shine comes from - friction warms the wax and levels it.
- 05
Wax over the top, if you want gloss
A very small amount of hard wax on a cloth, in tight circles, on the toe cap and heel counter only. Those two areas do not flex, which is why a built wax shine survives there and cracks anywhere else. Build it in thin layers rather than one thick one.
- 06
Finish on a cloth
A final buff with a clean soft cloth, or the back of an old cotton t-shirt. This is the step that turns a sheen into a shine, and it costs nothing.
The polishes, ranked
We have not run a comparative shine test and will not pretend to. What follows is ranked on what each product is for, what it does to the leather, and what it costs - with the honest downside on every one.
Kiwi wax paste is the tin every shoeshine stand has used for a century and still the cheapest route to a real wax gloss. It is also a coating and nothing more - it does not feed the leather at all, and if you never strip it, it builds up in the flex crease and cracks there. Color-matched, so a tan tin is useless on black boots.
Red Moose cream polish is the middle ground: pigment plus a little nourishment, so it puts color back into scuffs rather than covering them. It absorbs instead of building up. It will not give you a mirror - that needs wax over the top - and the color has to match.
Saphir Medaille d’Or Pommadier is the one place on this page where paying several times more buys something real: it conditions as it colors, so it is closer to two products than one. It is overkill on a boot that lives in mud, and a 75 ml jar costs what four tins of wax do.
Kiwi Instant Shine is a sponge-top bottle that puts a shine on in thirty seconds. It is genuinely useful in a hotel room and genuinely bad for the boot long-term - it builds a film that eventually flakes out of the flex crease, and it does nothing for the leather. We list it because people buy it anyway and should know what it is.
A horsehair brush is not optional equipment. Most of the shine on a properly polished boot comes from brushing, not from product, and a brush is a one-time purchase that outlasts every tin. Which brush for which job is in the boot brush roundup.
Scuffs: when polish is the answer and when it is not
A scuff that has removed the finish but not the leather - a pale mark you can feel is smooth - is exactly what cream polish is for. Work matched cream into it in circles, let it haze, brush it out. That is a five-minute repair.
A gouge that has torn into the leather is a different problem. Polish will fill it visually and it will keep reappearing every time the boot flexes. That is a cobbler’s job or a permanent feature, and no product on this site closes it.
Neutral or matched color?
The cream aisle offers both and the choice is less obvious than it looks.
Neutral carries no pigment. It conditions and shines without changing the color, which makes it the safe choice on any boot whose shade you are not certain of, on two-tone boots, and on anything where a slightly wrong brown would look worse than a faded one. It will not, however, do anything about a scuff that has gone pale.
Matched color is what actually repairs the look of a scuffed boot, because it puts pigment back where the finish was removed. The risk is real: brown leather comes in an enormous range and a cream two shades off reads as a patch rather than a repair. Test it on the heel counter first, let it dry fully, and look at it in daylight rather than under a bulb.
Our default for most people is neutral cream plus a matched wax for the toe if you want gloss - you get the conditioning and the shine without betting on a color match across the whole boot.
A mirror shine, and whether it is worth your time
The high-gloss toe cap you see on dress shoes is built rather than applied: many very thin layers of hard wax, each one worked in with a barely damp cloth in tight circles until the surface levels out. It takes half an hour the first time and it genuinely does look extraordinary.
On boots, we would think twice. A mirror finish only survives on panels that do not flex, which on a boot means the toe cap and the heel counter and nothing else. It also builds a thick wax film, and a thick film on a boot that gets worn in weather will eventually craze. If the boots are for occasions, go ahead. If they are for walking in, a well-brushed cream finish looks better after a month and takes five minutes.
The kit, and what you can skip
You need less than the shelf suggests. A cream polish, a horsehair brush and an old cotton cloth will do ninety percent of everything on this page. Add a tin of hard wax if you want gloss on the toe, and a dauber brush if you dislike getting polish on your fingers.
What you can skip: the bundled kits that pair a tiny tin with a plastic-bristle brush, because the brush is the part that matters and the plastic ones do not generate the friction that makes a shine. A separate brush per color is a nicety rather than a necessity - one brush for dark, one for light is plenty. Which brushes are actually worth owning is in the boot brush roundup.
What not to do
- Polishing suede or nubuck. Never. A napped surface is maintained mechanically with a brush and a crepe eraser, and wax mats it permanently - how to clean suede boots has the right method.
- Building wax into the flex crease. The crease moves thousands of times a day and a hard film there will crack and flake. Keep built shine to the toe cap and heel counter.
- Polishing instead of conditioning. The most expensive mistake here, because it looks like care and is not. Polish seals; conditioner feeds. A boot that only ever gets the first one dries out under a shiny surface.
- Heat to speed the drying. Atsko is explicit that force drying with heat causes leather to harden and shrink, and Ariat says plainly not to dry boots with direct heat because it causes cracking.
Stripping old polish, and when you need to
Wax builds. After a few years of regular polishing without ever cleaning back, a boot carries a layer of old wax that stops new product absorbing and cracks visibly in the flex crease.
The tell is a surface that looks slightly plastic, or fine crazing in the crease that is in the finish rather than the leather. The fix is saddle soap or a leather cleaner, worked in and wiped off, repeated until the cloth stops coming away brown. Then condition, because stripping removes oils too, and start again.
Most people never need to do this. If you condition regularly and keep built wax off the crease, the build-up never gets there.
How often
Cream polish when the boots look tired - for most people that is a few times a season rather than weekly. Wax whenever you want the shine back, which does no harm as long as it is thin and kept off the crease. Conditioner on its own schedule underneath all of it.
The one rhythm worth committing to is the conditioning, because that is the part that decides whether the boots are still flexing in five years. Polish is the part that decides whether they look after themselves in the meantime, and it is much more forgiving.
What we would buy for this
Chosen from the same registry as our roundups, on published specifications rather than on testing we have not done.
Kiwi
Kiwi Shoe Polish Paste
The tin every shoeshine stand has used for a century, and still the cheapest way to put a real wax shine on a boot.
Skip it if: You want the leather fed rather than coated. Wax polish sits on the surface; it does not condition.
#ad Price as of September 13, 2026, from Amazon. Prices change. How this site is funded.
Red Moose
Red Moose Boot & Shoe Cream Polish
A cream polish that puts pigment and a little nourishment back at the same time - the middle ground between a wax tin and a conditioner.
Skip it if: You want a mirror gloss. Cream polishes give a soft sheen, not a shine.
#ad Price as of September 13, 2026, from Amazon. Prices change. How this site is funded.
Saphir
Saphir Medaille d'Or Pommadier Cream, 75 ml
The cream the shoe-care obsessives use, at four times the price of the supermarket tin - and the one place on this page where paying more buys something real.
Skip it if: The boots are work boots. This is a lot of money to put on something that lives in mud.
#ad Price as of September 13, 2026, from Amazon. Prices change. How this site is funded.
Kiwi
Kiwi Instant Shine & Protect Liquid Polish
A sponge-top bottle that puts a shine on in thirty seconds. It is the right answer for a Tuesday morning and the wrong one for the boots you care about.
Skip it if: You are trying to look after the leather. This is a coating with an applicator, nothing more.
#ad Price as of September 13, 2026, from Amazon. Prices change. How this site is funded.
Lincoln
Lincoln Horsehair Shoe Shine Brush
The one brush every routine needs: soft enough not to scar a finish, stiff enough to move dried mud.
Skip it if: You are working on suede - horsehair will not lift the nap.
#ad Price as of September 13, 2026, from Amazon. Prices change. How this site is funded.
Frequently asked
How do you polish boots properly?
Clean them and let them dry, condition and let that absorb, work cream polish in with a cloth in small circles, let it haze for ten to fifteen minutes, brush it out briskly with a horsehair brush, then add thin layers of hard wax on the toe and heel only if you want gloss. Finish on a soft cloth.
What is the best polish for boots?
Cream polish if the boots are scuffed or faded, because it carries pigment into the leather. Hard wax if they just look dull and you want shine. Most people doing a full job want both - cream first for color, a thin wax over the toe and heel for gloss.
Does shoe polish condition leather?
Wax polish essentially does not - it is a surface film. Cream polishes carry some nourishment, and a premium cream carries a useful amount. Neither replaces a conditioner, and a boot polished for years without conditioning will dry out underneath the shine.
How do you fix scuffed leather boots?
If the scuff removed the finish but not the leather, matched cream polish worked in with a cloth and brushed out will take it back. If it tore into the leather itself, polish only hides it until the boot next flexes - that is a repair rather than a polish.
Can you polish suede or nubuck boots?
No. Polish mats a napped surface permanently. Suede and nubuck are maintained dry, with a brass-and-nylon brush and a crepe rubber eraser block, and never with wax, cream or oil.
How often should you polish your boots?
Cream when they start looking tired - a few times a season for most people. Wax as often as you like the shine, kept thin and off the flex crease. The schedule that actually matters is the conditioning underneath, not the polish.
Where the figures on this page came from
- Ariat - How to clean cowboy boots (four-step routine, no direct heat, non-oil-based conditioner, 3 and 6 month intervals, exotic leathers)
- Atsko - Boot Care (force drying causes leather to harden and shrink)
- Lexol - Leather Conditioner (sizes, no greasy residue or silicones, 6-month interval)
- Bickmore - leather care product range